Placing buildings on the terrain

And apart from this the models are also still on different heights related to the model height (i.e. higher models are drawn partly below surface and only small models are more or less exactly on the ground).

Quite interesting is also that it seems to me that the models are not properly clipped by the terrain (contrary to the example in the introduction of this thread).

Are you waiting exactly 10 seconds, or does that happen to be when the callback executes? Since terrain heights really don’t change perhaps just do sampleTerrain once, then incorporate that into the original data.

When positioning a model it actually positions the center of the model, so you’ll have to raise it a bit if you want the bottom on the terrain. On my example the center was 30 meters above the ‘terrain bottom’ so they are raised 30 meters.

14 to 15 might be the highest detail for triangle mesh. If you look at the wireframe going higher than 14/15 seems to have the same triangle mesh detail.

What function are you using to position the camera?

I’m waiting 10 seconds after the site started to load (to make sure that sampleTerrain is finished for all points). sampleTerrain is not within the loop, so it is executed only once for the whole array. I tried to put the result from the sampleTerrain back to the original data, but I got always a new object at the end of the array and was not able to set it “within” the array, so that was the reason for the second array; and this part works quite well.

A ok, thanks for the clarification with the positions. Hm, that means that my problem remains. Or is there a way to get the max. “height” of the model from the .glTF so that this value can be used to “elevate” the model on the terrain? (something like height_offset = get.ModelHeight()/2).

The clipping with terrain works now: The terrain was loaded automatically (with BaseLayerPicker: false); but for the clipping I had to set BaseLayerPicker to true -> the STK is not loaded (visually), this means the models are flying around -> get the STK direct from the dropdown menu -> and now the models are clipped with the terrain (so the parallax-problem is away and only the height offset problem remains).

Camera:
viewer.scene.globe.maximumScreenSpaceError = 1;
var center = Cesium.Cartesian3.fromDegrees(lat, long, 500);
var heading = Cesium.Math.toRadians(90.0);
var pitch = Cesium.Math.toRadians(-55.0);
var range = 1000.0;
viewer.camera.lookAt(center, new Cesium.HeadingPitchRange(heading, pitch, range));
var scene = viewer.scene;
var canvas = viewer.canvas;
canvas.setAttribute(‘tabindex’, ‘0’); // needed to put focus on the canvas
canvas.onclick = function() {
canvas.focus();
};

``

Without the terrain I can move arount the point that is defined with lat, long; as son as I load the terrain this remains but the “pitch” is not loaded (the reason for this is that I need in the end a camera that has all parameters fixed and can only be rotated at a certain distance and pitch around a given point).

When sampleTerrain calls the callback you know it’s finished, it could be less than 10 seconds. You could place the height data into a textarea, copy/paste that into a js file array and get quick access on all later loads.

I’m not sure how to get model dimensions from .glTF files, maybe someone else here knows of a way.

Do you set terrainProvider at startup, or set it manually with the buttons?

On the code you provided you have lat before lon it seems, though Cesium expects lon before lat.

https://github.com/AnalyticalGraphicsInc/cesium/blob/master/Source/Core/Cartesian3.js#L786

Perhaps with the initial lookAt settings it pushes the camera into a mountain and gets shoved up?

When sampleTerrain calls the callback you know it’s finished, it could be less than 10 seconds. You could place the height data into a textarea, copy/paste that into a js file array and get quick access on all later loads.

It is definitely less than 10 seconds, thats just to be sure; thanks for the other idea, I did not think about this, hope I’ll find time to implement it tomorrow.

I’m not sure how to get model dimensions from .glTF files, maybe someone else here knows of a way.

So far I’m using the workaround that I had before with a variable I have by hand (approximates the height of the model) that is added to the height from the terrain, works not that bad and with the clipping it gives me a better result than without the terrain.

Do you set terrainProvider at startup, or set it manually with the buttons?

I thought at startup, it shows me also visually the terrain, but the clipping does not happen. It clips whit the models only when I deactivate the terrain and activate it again after the models are loaded manually with the buttons from the navigation panel. It could be that first the terrain is loaded, then the models are loaded and due to this no clipping happen. Maybe it has to be the other way around: First model, then terrain → clip. So I’ll try to load the terrain for the models, then load the models and after that load again the terrain for the visualization (and clipping) (or your idea with the models without height, then add the terrain and later the height, that should work as well but not with my implementation I have right now).

On the code you provided you have lat before lon it seems, though Cesium expects lon before lat.

https://github.com/AnalyticalGraphicsInc/cesium/blob/master/Source/Core/Cartesian3.js#L786

ups, that is just a typo for the example here, in my working example it is long, lat

Perhaps with the initial lookAt settings it pushes the camera into a mountain and gets shoved up?

A, that could be! it is quite a mountainous area where I’m working. Will test that on the weekend, thanks. (However, I think with an distance of 1 km it should not touch the mountain, but maybe it has something to do with the field of view (and hence it is a bit “further” away than 1 km). I was also playing around with the height of the center (now set to 500), maybe I have to move this a bit higher (clearer over the terrain).

When outputting to a textarea you can format it anyway you want, then just copy/paste/done!

That’s odd that you have to activate terrain after the models for proper clipping. On my example if I start with terrain on

var viewer = new Cesium.Viewer(‘cesiumContainer’, {

terrainProvider : new Cesium.CesiumTerrainProvider({

url : ‘//cesiumjs.org/stk-terrain/tilesets/world/tiles’}),

baseLayerPicker : false

});

``

You can see the model buried under the terrain, but if you start with it off then turn it on manually you can’t see it buried. That might be a bug.

Is both what you’re looking at and the camera over the terrain?

Ciao

I checked it, my “center/target” and my camera are both clearly over the terrain.

I found now a small workaround (not a pretty one, but hey, it works…):

For the clipping error (no clipping with terrainProvider-data; but clipping with baseLayerPicker-data):

  • I have created a custom BaseLayerPicker (according to the ref).
  • In the viewer constructor the baseLayerPicker is set to false, no terrainProvider is selected (and, since I have my own data and do not want the basic bing maps, imageryProvider is set to false).
  • after that I load the terrain with this code (takes the defined data [terrainProvider] from the manual (and hidden) baseLayerPicker: var baseLayerPicker = new Cesium.BaseLayerPicker(‘baseLayerPickerContainer’, {globe:viewer.scene.globe, terrainProviderViewModels:imageryViewModels});
  • after that you can load more layers if you need some (I tested it with an overlay of OSM data, works perfectly).
    Thats it, even my models are loaded after the Terrain/OSM data; it clips perfectly with the terrain.

For the zoom-error (the camera was looking down at nadir and not with the specified pitch):

  • I tested several distances (range) with a given pitch and heading and found a threshold somewhere at 2000 meter to target. Until 2000 meters it worked fine, after that the camera was automatically shifted.
  • Since I needed a distance quite near to the target, I initially set a range of 2000; then I load all data (terrain, models, tiles etc.) After that, I call the camera.zoomIn to the needed distance. Funnily, this works perfect -> I have the camera at the desired position with my 3D models clipped with the terrain.

However, I have still two issues:

  • The height-offset from center of model to terrain is still not fixed.
  • It seems to me that my own tileServer takes the tiles defined for the ellipsoid-LOD and not for the terrain LOD, this means that they are a bit blurry on the higher terrain altitude. If there is a way to offset this as well, let me know.

Regards
Martin

Getting models to clip with the terrain seems to be rather complicated! It would be nice if you can select if a model is to be clipped by the terrain or not by simply setting a variable.

There are some U.S. flat land areas that are >2000 meters above the reference ellipsoid, such as near the NM and CO state border (flat lands in Tibet are typically >5000 meters above the reference ellipsoid.) But if the place you’re looking at is 500 meters above reference ellipsoid as in your example that shouldn’t be a problem.

In Cesium 1.7: “Added camera-terrain collision detection/response when the camera reference frame is set.” I think you can turn this off, but I don’t know which var to set.

Alternatively (instead of lookAt then zoomIn combo) you could do a setView then do your own ranging:

//first do setView on the target, then move back with the following:
var CC3=Cesium.Cartesian3;
var temp=new CC3()
CC3.negate(camera.direction,temp);
CC3.mutliplyByScalar(temp,range,temp);
CC3.add(temp,camera.position,temp);
camera.position=temp.clone();

``

If you also want to set the camera’s transform, do a lookAtTransform(transform,camera.position); Where transform is the ENU transform of the target. This should retain camera position.

I wonder if there is a way to get size data of a model with all dimensions scaled at 1?

Regarding Tile LOD

My guess is that tile LOD is determined the same way whether it be the tile triangle mesh or the tile imagery.

Factors in determining what LOD level to display:

-the lower the distance to the tile’s bounding sphere the higher the LOD

-the lower the FOV the higher the LOD

These 2 factors basically estimate how much Solid Angle the tile takes up http://en.wikipedia.org/wiki/Solid_angle Solid angle is basically ‘angular area’.

Then it converts ‘angular area’ to ‘screen pixel area’

Then calls for the LOD that is appropriate to that ‘pixel area’.

Such as a 100x100 pixel image goes well with 100x100 pixel area. (but a 1000x1000 pixel image would be a waste with a 100x100 pixel area.)

Because it is a bounding sphere the pitch angle doesn’t factor in, as a sphere takes up the same solid angle no matter what angle it is viewed from. If tiles had bounding boxes instead of spheres, then pitch angle could be factored in as well. Tile height (lowest valley to highest peak) is usually quite a bit less its width or length. So looking obliquely at a tile would result in a lower solid angle than looking straight down at it.

I wonder if Earth imagery providers store oblique mipmaps (like in the image here)

Or just straight down mipmaps (like the image here)

tile’s bounding sphere https://cesiumjs.org/data-and-assets/terrain/formats/quantized-mesh-1.0.html

(there’s also viewer.scene.globe.maximumScreenSpaceError which lets the user adjust LOD)

Much of this is supposition though. Kevin Ring wrote an article about this but I misplaced the link.

Scratch that idea of oblique mipmaps, it would only work on flat tiles and most tiles are hilly with surface normals in all sorts of directions. I found the slide show I was looking for earlier https://cesiumjs.org/massiveworlds/index.html#WorldScaleTerrainRendering World-Scale Terrain Rendering.

Thanks for the explanation and the slides, very interesting.

I was now able to extract the height of the models in meters (see below) and tried then to set an offset of half the height to the height from sampleTerrain. the result is, that (at least) all models are on a similar reference level (i.e. height). However, I guess due to the maximal possible precision of 14 in the sampleTerrain function when I’m in reality somewhere on level 16, this results in partly buried models. So I still have to compromise between flying/burying of the models.

To get the height of the models I used some collada (.dae) files (by the way: It was just working with files that had the following pipeline: CityEngine export to .fbx (on mac os) -> convert with AnyCad Exchange3D to .dae (on windows [attention: when you install this program you get also some chinese anti-virus software to your system; so no guarantee for any problems! Also, the exporter has Z as up axis and not Y, this gives you a 90° rotated model that can easily be corrected when you set the up-axis right]. With the direct exporter from CityEngine to .dae or the autodesk fbx converter I got only a non working .dae [for the glTF convert- as well as for the “dimension” task]).

Then I use three.js with ColladaLoader.js to load the .dae file and looped through my array (since it needs also some time I used this “delay” function here). It was also only possible to do 16 models at the same time due to some webGL limitations. During the loop I a) loaded the model; b) got the height (z-Value) of my model with THREE.Box3(); and finally c) logged the respective value to a text file (with debugout.js). This values are then copied to my array where I draw the models in Cesium.

Although I had trouble getting viewer.scene.globe.getHeight to work in SandCastle, it works just fine in a regular Cesium app. You can use this to test if there’s any difference between 14-15 LOD and 16-20 LOD by moving the camera very close to the ground at the spot. Change viewer.scene.screenSpaceCameraController.minimumZoomDistance to 2 (default is 20 meters) to get the tile LOD as high as you can.

Continuation of https://groups.google.com/d/msg/cesium-dev/mwW1mQ7kKgw/_fhFomuVgG4J

I noticed everything is set at 113.5 meters. Model origin to ‘terrain bottom’ (top of the basement) can vary from model to model and each part of a city block can vary in terrain height. I’m guessing that since the bottom of the basements seem to align that the model origin is at the bottom of those models.

Hyper Sonic, again thank you for the code to capture a position. I got it to do exactly what I needed. Capture a position, mouse around, and then return to the original position. Here is a link http://vcities.ite-stl.org/Cesium/Apps/Sandcastle/gallery/position.html.

The link also is a good example of the issues we are facing. First, it takes a while to load the page. When it is loaded go to 1919. When I mouse around the graphics are pokey. Finally, we have a large catalog of buildings that we need to move and we only know how to set the position relative to the ground, building by building. We do know the basement height but haven’t figured out how calculate a per building height based on basement height and terrain height.

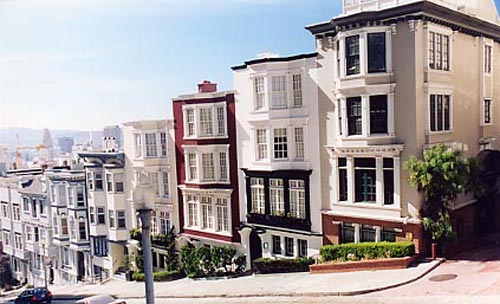
It’s OK that it takes a few seconds to load, but a progress indicator might be nice, such as x% loaded on a div off to the side. You might have to carefully place each building. I made a SandCastle that allows one to move an entity in any cardinal direction either 1 meter or 10 meters which might help, it prints the new location in the console. I’d like to do the same for orientation, but I don’t know how to get that. To get position I have to use a private property: thebox._position._value . I’m not sure yet about orientation, thebox._orientation._value doesn’t work. Sure would be nice to have access to entity modelMatrix .

var viewer = new Cesium.Viewer(‘cesiumContainer’);

var CC3 = Cesium.Cartesian3;

var magnitude = 1;

var thebox = viewer.entities.add({

name : 'building',

position: Cesium.Cartesian3.fromDegrees(-90.1922703175, 38.6286636758, 30),

box : {

    dimensions : new Cesium.Cartesian3(40, 30, 60),

    material : Cesium.Color.RED,

    outline : true,

    outlineColor : Cesium.Color.BLACK

}

});

viewer.zoomTo(viewer.entities);

function getVector(name)

{

var GD_full_transform = Cesium.Transforms.eastNorthUpToFixedFrame(thebox._position._value, viewer.scene.globe.ellipsoid, new Cesium.Matrix4());

var GD_rot_transform = Cesium.Matrix4.getRotation(GD_full_transform,new Cesium.Matrix3());

if(name=="east"){return Cesium.Matrix3.getColumn(GD_rot_transform,0,new CC3());}

if(name=="north"){return Cesium.Matrix3.getColumn(GD_rot_transform,1,new CC3());}

if(name=="up"){return Cesium.Matrix3.getColumn(GD_rot_transform,2,new CC3());} 

}

function move(scalar,unitVector)

{

var mycarte = thebox._position._value;

var relMove = CC3.multiplyByScalar(unitVector,scalar,new CC3());

CC3.add(mycarte,relMove,mycarte);

thebox.position = mycarte;   

var mycarto = new Cesium.Cartographic();

mycarto = viewer.scene.globe.ellipsoid.cartesianToCartographic(thebox._position._value);

console.log("lon "+mycarto.longitude/Math.PI*180);

console.log("lat "+mycarto.latitude/Math.PI*180);

console.log("alt "+mycarto.height);

}

Sandcastle.addToolbarButton(‘magnitude 1’, function()

{magnitude=1;});

Sandcastle.addToolbarButton(‘magnitude 10’, function()

{magnitude=10;});

Sandcastle.addToolbarButton(‘east’, function()

{move(magnitude,getVector(“east”));});

Sandcastle.addToolbarButton(‘west’, function()

{move(-magnitude,getVector(“east”));});

Sandcastle.addToolbarButton(‘north’, function()

{move(magnitude,getVector(“north”));});

Sandcastle.addToolbarButton(‘south’, function()

{move(-magnitude,getVector(“north”));});

Sandcastle.addToolbarButton(‘up’, function()

{move(magnitude,getVector(“up”));});

Sandcastle.addToolbarButton(‘down’, function()

{move(-magnitude,getVector(“up”));});

``

Thanks,
I know I keep saying the same thing but you example is going to be very useful. One thing, a bit off the subject, that has been giving me fits is how you get the cube “name” to appear in a billboard when you click on it. This would be a very useful feature for us, click on a building and have information appear.

Duhhhh, I think I just figured out how to get the popups. Sorry

I also was wondering how to make entities selectable. All of these entities are selectable by default http://cesiumjs.org/Cesium/Apps/Sandcastle/index.html?src=Geometry%20and%20Appearances.html&label=Showcases as I don’t see something like selectable:true . Yet you have model entities, perhaps selectability is off by default for those?

"Unless we specifically disable it, clicking on an entity in the Viewer will show the SelectionIndicatorwidget at the Entity’s location as well as bring up the InfoBox widget to provide more information. "

In my example program you can change

thebox._position._value

to

viewer.selectedEntity._position._value

Then you can select and move any entity from a group of entities.

So how did you make them selectable? Did adding infobox property also make them selectable?

Previously, I had

var viewer = new Cesium.Viewer('cesiumContainer', {
            infoBox : false,
            selectionIndicator : false,
            terrainProviderViewModels: terrainModels,
            selectedTerrainProviderViewModel: terrainModels[1]  // Select STK High-res terrain
});

All I did was remove the two "false" lines.

var viewer = new Cesium.Viewer(‘cesiumContainer’, {
terrainProviderViewModels: terrainModels,
selectedTerrainProviderViewModel: terrainModels[1] // Select STK High-res terrain
});

Here is the new URL http://vcities.ite-stl.org/Cesium/Apps/Sandcastle/gallery/Block512.html

The buildings on the right have some play information. Eventually there will be some building history. I also began to move buildings to ground level.

Again, too quick on the trigger. Go to year 1919 to see the buildings I am referring to.

Ah, I forgot to look at the viewer options.

The buildings look much better now. The origin on some of the buildings seems to be away from the center as the green crosshairs that appear are off to the side. I wonder if there’s a way to correct this without having to adjust the model.

Some buildings can look odd due to terrain tilt. Here’s some extreme examples in SF: